The LearnDash Feedback add-on provides a feedback tab on the course landing page that your students can use to submit their feedback on the course.
Table of Content
Installation
- Install the LearnDash plugin & activate it.
- Install the LearnDash Feedback add-on and activate it.
- There will be a new Dashboard entry named as “LD Feedbacks” on the backend.

LearnDash Feedback Settings
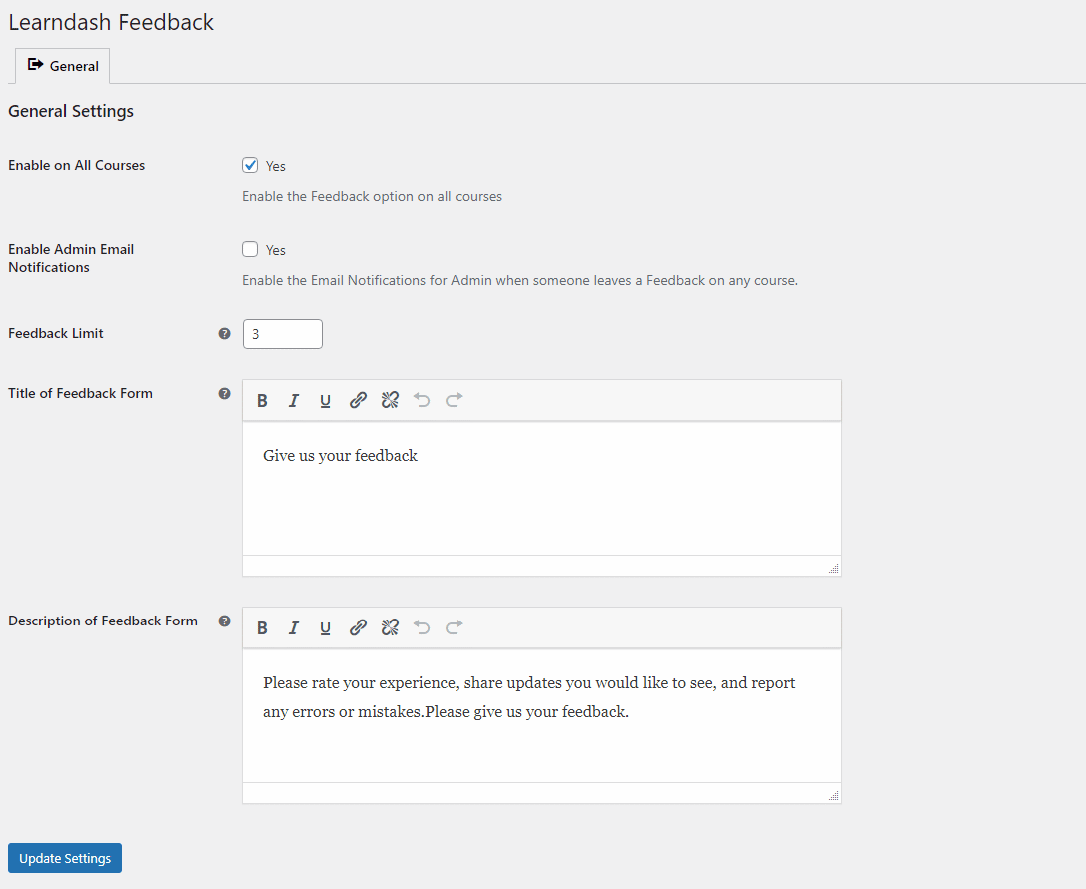
Navigate to the WordPress dashboard and select the Settings from the “LD Feedbacks” menu.

Enable on All Courses:
This is the global setting to enable the Feedback Tab to be displayed on all courses.
Enable Admin Email:
With this setting enabled, admins will receive an email notification when a user leaves feedback on a course.
Feedback Limit:
This option lets you set a maximum number of reviews the students can submit.
Title of Feedback Form:
Here you can configure the title of the Feedback form.
Description of Feedback Form:
Here you can configure the description for the Feedback form.
This is how the Feedback tab will look on the Frontend

Feedbacks Review
After the successful submission of feedback, admins will be able to review the feedback submitted by students on the backend.
Navigating to the LD Feedbacks > All Feedbacks, will list all the feedbacks submitted by the students.

FAQ
How can we specify the course’s name on the submitted feedback?
A dropdown filter is available on the submitted feedback listing page to identify the feedback based on their courses.
Changelogs
1.1.1
- Fixed typos and UI issues
1.1.0
- New: Added the columns for username, course name, and submitted date of submitted review on the backend.
- New: Added Admin Email Notification functionality.
- Fix: Fixed JS conflict with Content Tab
- Fix: Fixed the visibility of the feedback tab on the lesson and topic pages.
1.0.0
- Initial Release